Add and manage users
Create accounts for staff and judges, give them roles, and switch accounts off when someone should no longer get in.
Who can do thisSuper AdminAdmin
Everyone who works in Tallybox is a user, and what they can do depends on their roles. Most people hold more than one role. Judges are users too, but they never sign in here: they score through a private link (see Give judges access to score).
Find a user
- Choose Users in the Administration menu
- Search by name or email, or open the filter buttonYou can filter by Role, by Status, by users with no role, or by judge and tabulator assignment.
- Choose View, Edit or Deactivate on the rowYou can also choose a name to open the View page.
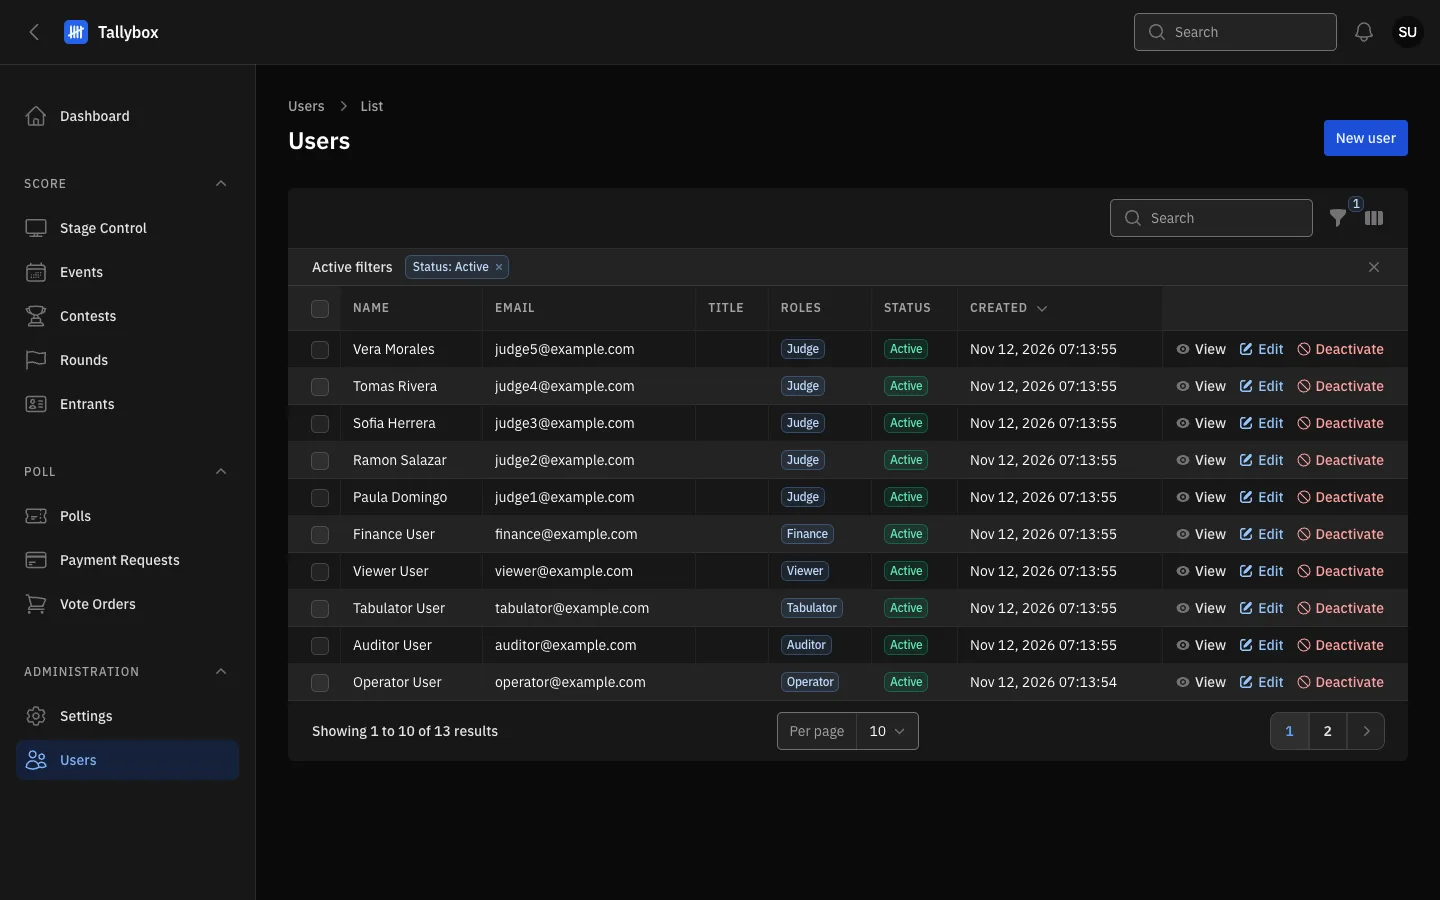
- New user: opens the form to add someone.
- Filters: narrow the list by role, status, no role or assignment.
- Status: Active: the list starts with active users only. Change the Status filter to see deactivated users.
- Row tick box: select several users to use the Bulk actions menu.
- Deactivate: switches this user off. A deactivated user shows Reactivate here instead.
Add a user
- On the Users page, choose New user
- Fill in Name and EmailThe email must not already belong to another user. Title is optional: it is printed beside the name on a scoresheet, for example "Chairman".
- Choose the Password field's Generate button, or type a passwordA password is required for every staff role. Leave it blank for a user who is only a Judge: judges never have a password. Use the eye button to show what was generated.
- Leave "Temporary password" on if they should choose their ownThey are then asked to set a new password the first time they sign in. It is ignored when the password is blank.
- Tick one or more Roles, then choose Create
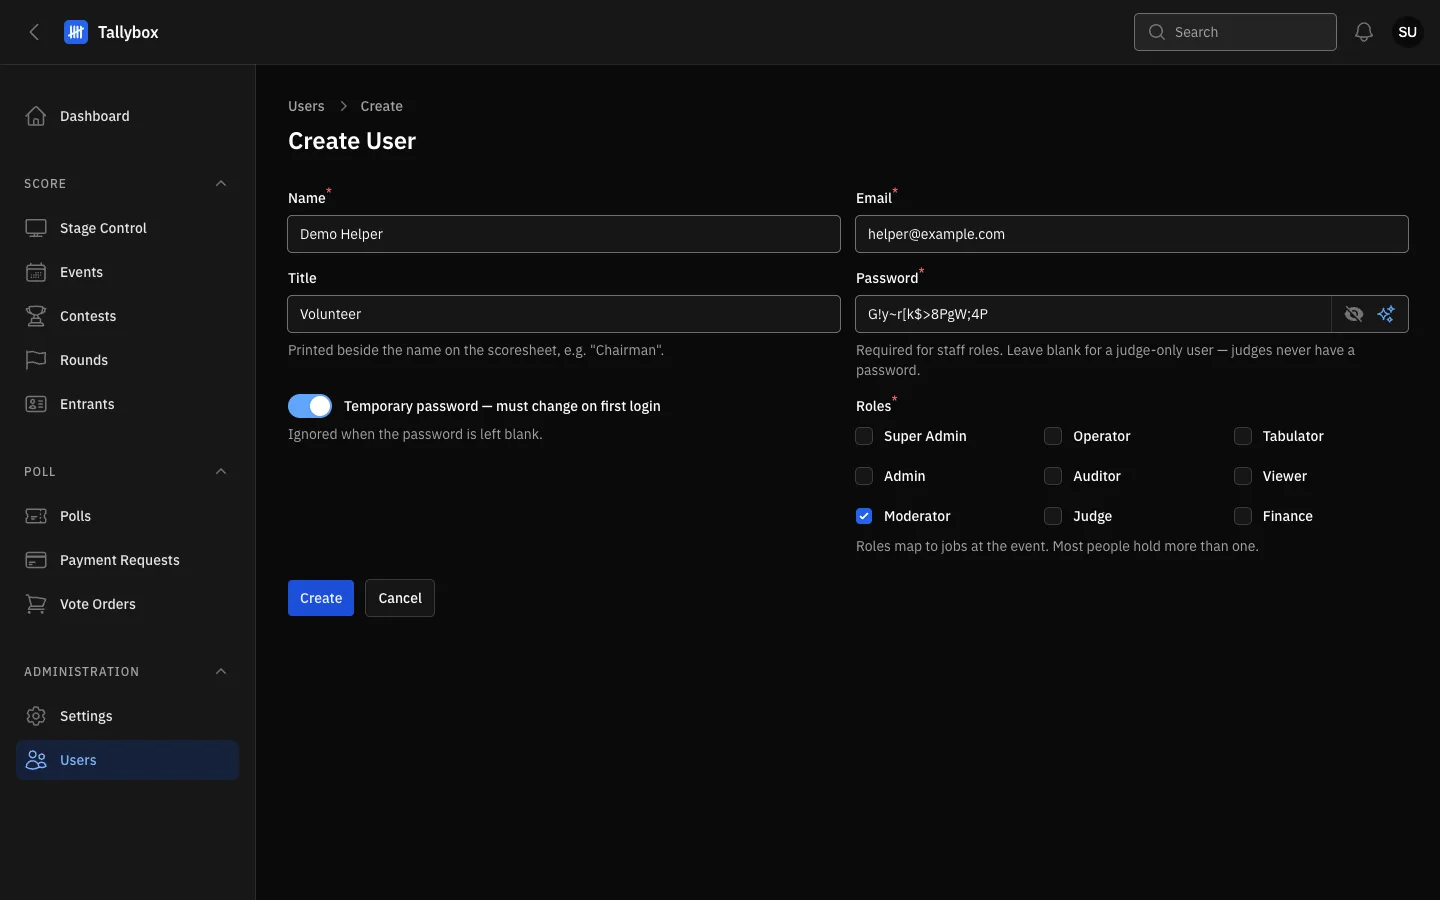
- Name and Email: both are required.
- Generate: fills the Password field with a strong random password.
- Temporary password: they must choose their own on first sign in.
- Roles: tick at least one. You only see the roles you are allowed to give.
- Create: saves the user.
Pass on the sign-in details
When the user is created, a "User created" window appears if you gave a password. It holds a ready-made message with the sign-in address, the email and the password.
- Choose Copy and send the message to the personUse a private channel, not a group chat.
- Choose DoneYou land on the new user's View page.
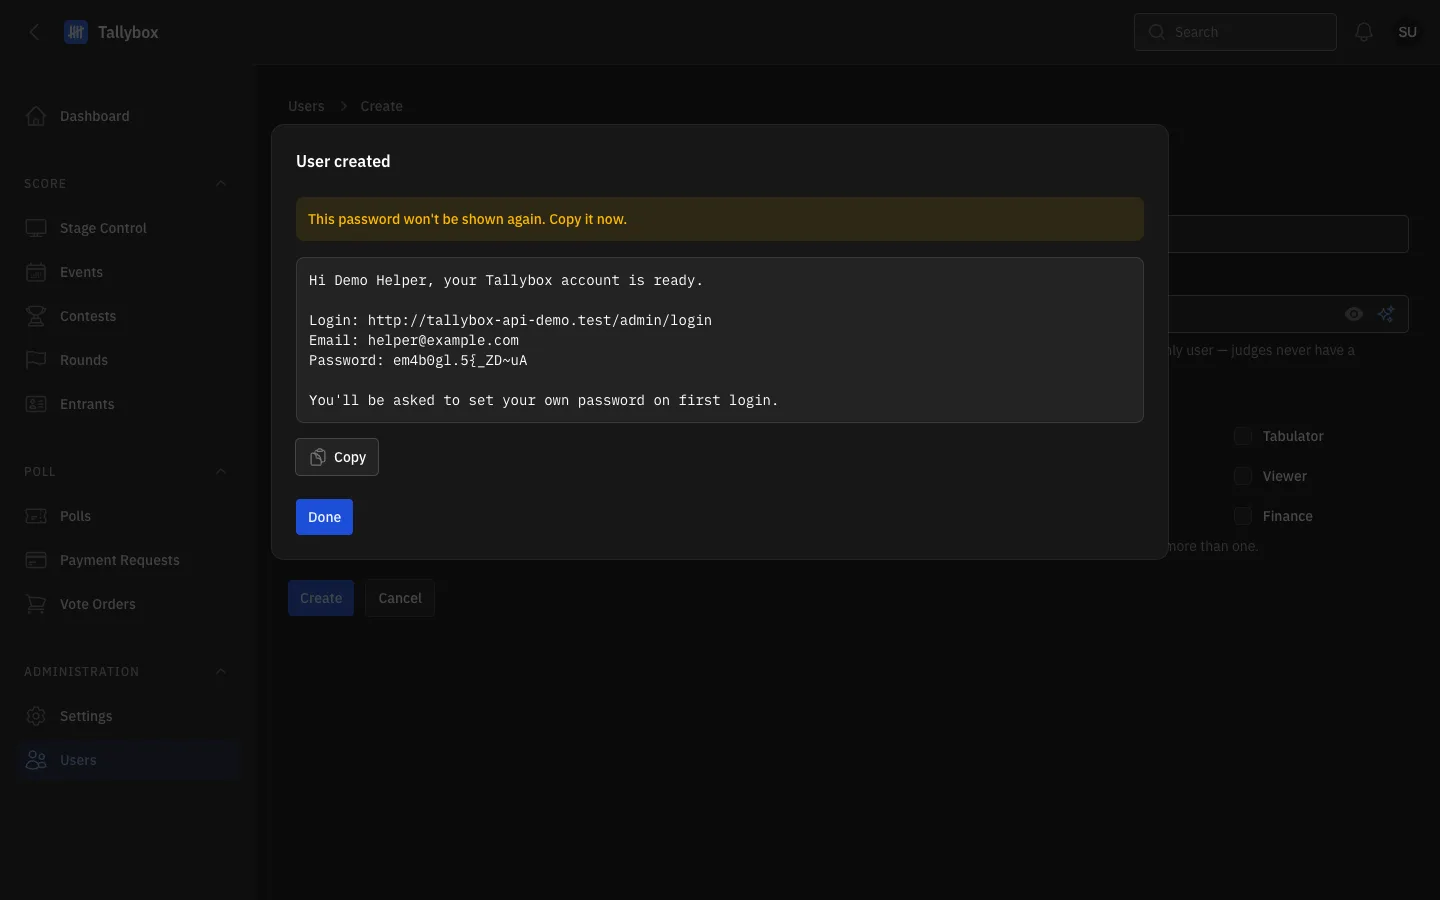
- The password is shown only now. It cannot be looked up later.
- The message: greeting, sign-in address, email and password.
- Copy: puts the whole message on your clipboard.
- Done: closes the window and opens the user.
View or change a user
- Choose View on the user's row
- Read their details, roles and status
- Choose Edit to change themOn the Edit page the password field is optional: leave it blank to keep the current password. The View button at the top takes you back.
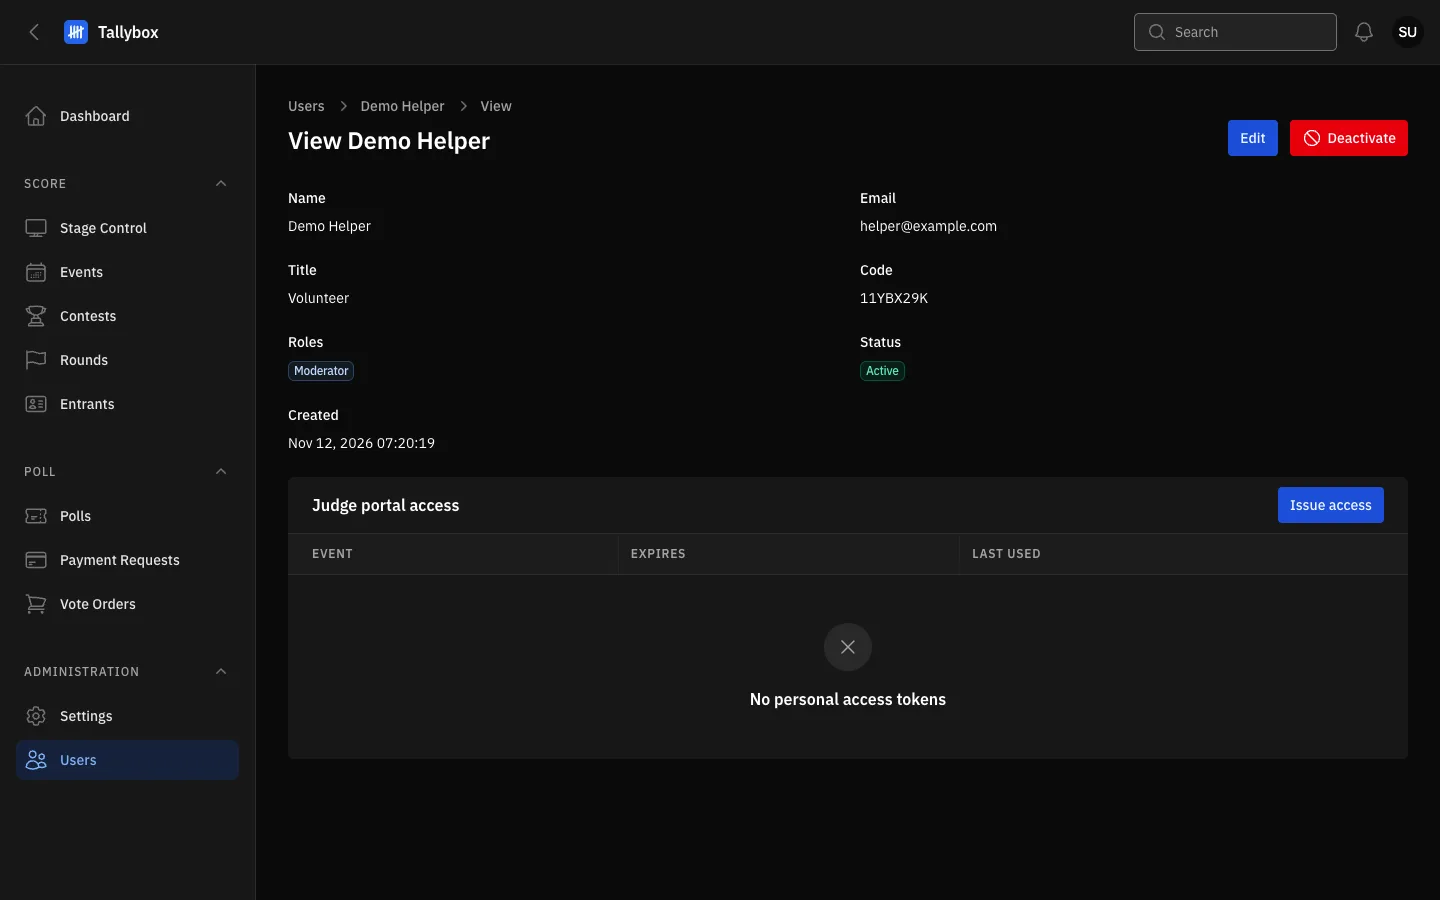
- Edit: change the name, email, title, password or roles.
- Deactivate: the same action as on the list.
- Status: Active or Deactivated.
- Judge portal access: where you issue or revoke a judge's link.
If a user holds the Admin or Super Admin role, you can open View but there is no Edit or Deactivate button for you. Ask a Super Admin.
Deactivate and reactivate
- Choose Deactivate on the user's row, or on their View page
- Read the message, then choose Deactivate
- To bring someone back, set the Status filter to Deactivated or All users, then choose Reactivate on their row
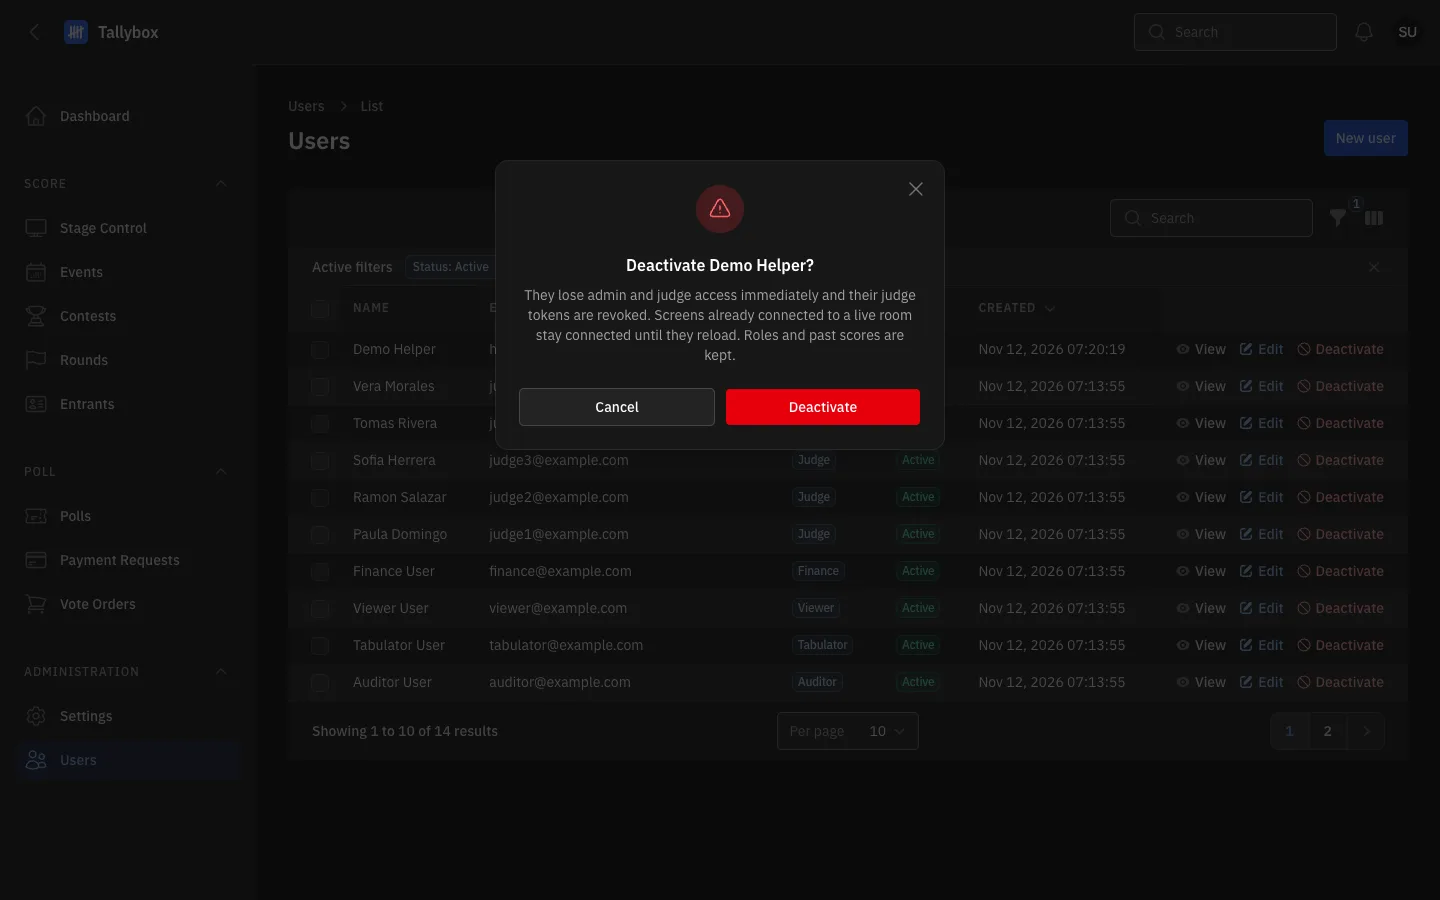
- The name check: make sure it is the right person.
- Cancel: nothing changes.
- Deactivate: confirms.
A deactivated user cannot sign in or do anything, whatever their role. Their roles and past scores stay. A screen they already had open on a live display stays connected until it is reloaded. Reactivating gives their panel access back. A judge's link and PIN are not restored: issue new judge portal access.
Change several users at once
- Tick the boxes beside the users
- Choose Bulk actions, then Deactivate or Reactivate
- ConfirmA message says how many were changed. Anyone it had to skip is named with the reason, for example a user you are not allowed to manage.
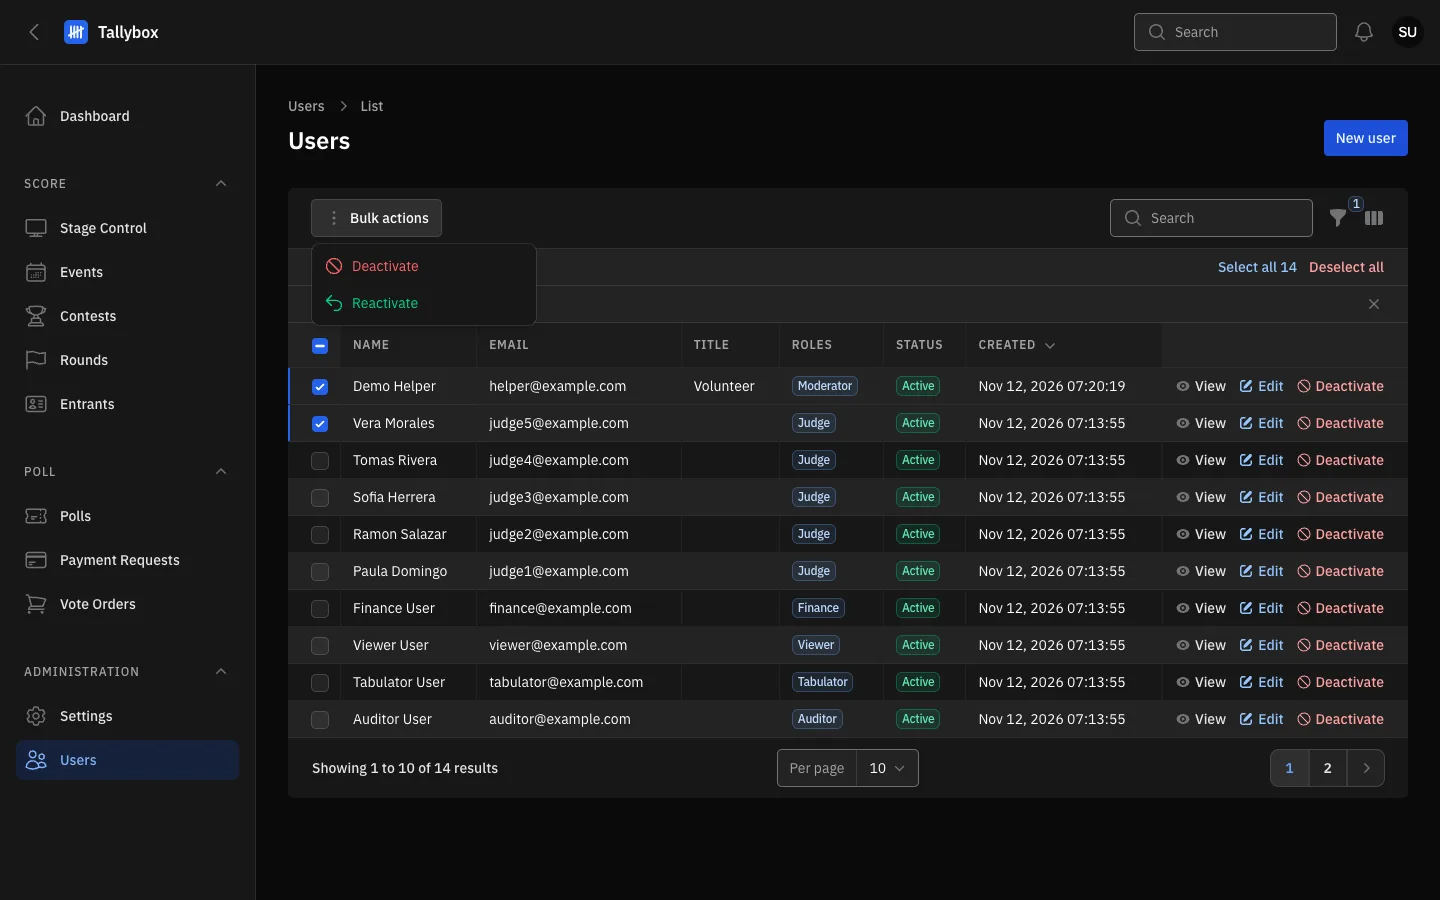
- Tick the users you want to change.
- Bulk actions: opens the menu for the ticked users.
- Deactivate: switches all ticked users off.
- Reactivate: switches ticked, deactivated users back on.
As a Super Admin you can edit, deactivate and reactivate any user, Admin and Super Admin accounts included, and give any role.